Ever been out on the water, miles from shore, and felt that little pang of anxiety? "How much fuel do I really have left?" Your boat's fuel sending unit is the piece of gear that answers that question, and it’s one of the most critical safety components you have.
Think of it as the translator between the fuel sloshing around in your tank and the needle on your dashboard gauge. It’s what keeps a great day from turning into a real headache—or worse, a dangerous situation. A reliable sending unit is your first and best defense against getting stranded.
What Is a Boat Fuel Sending Unit?
You wouldn't dream of taking a long road trip in a car with a broken gas gauge, right? The constant guessing and stress would be awful. Now, imagine that same feeling, but you’re miles offshore where running on empty has much more serious consequences. That's exactly why a boat fuel sending unit isn't a luxury; it's a non-negotiable piece of safety equipment.
At its heart, a fuel sending unit is a simple sensor that sits inside your fuel tank. Its one and only job is to measure how much fuel you have. It then turns that measurement into a small electrical signal, sends it up to your helm, and tells the gauge's needle where to point. Without it, you're just guessing, and that’s a risk no boater should ever take.
Its Role in Your Boat's Fuel System
The sending unit is the starting point for your entire fuel monitoring system. It gathers the raw data that your gauge needs to give you an accurate picture of what's happening in the tank. This constant feedback is crucial for a few key reasons:
- Safety on the Water: Knowing your real-time fuel level is everything for proper trip planning. It stops you from heading out too far without having enough in the tank to get back safely.
- Protecting Your Engine: Running a tank dry can suck sediment and air into your fuel lines, which is a great way to cause engine damage and land you a hefty repair bill.
- Running an Efficient Boat: Good fuel data helps you keep an eye on consumption rates. You'll notice if you're burning more fuel than usual, which could be a sign of a leak or an engine issue.
This little component is so important that it's part of a huge global industry. The market for reliable fuel tank sending units is valued anywhere from USD 1.2 billion to USD 2.17 billion, which shows just how vital they are across all kinds of vehicles and machinery. You can dig deeper into the fuel tank sending unit market research to see how these devices are a cornerstone of modern engineering.
A faulty fuel sending unit can turn a perfect day on the water into a dangerous situation. It’s the unsung hero that provides peace of mind, quietly working in the background to keep you informed and safe.
Ultimately, getting to know this component is the first step toward truly understanding your boat’s fuel system. It’s a small part with a massive responsibility.
Ever wondered how the fuel sloshing around in a hidden tank translates to that neat little needle on your dashboard? The magic happens thanks to your boat's fuel sending unit. Think of it as a translator, converting the physical fuel level into an electrical signal your gauge can understand.
The process is surprisingly straightforward. In fact, the most common type of fuel sender isn't all that different from the float system you’d find inside a toilet tank. As the water level changes, a float on an arm moves with it, opening or closing a valve.
Your fuel sender works on a similar principle, but instead of controlling a valve, it changes an electrical signal.
The Classic Float Arm Sender
The most traditional sender uses three key parts to get the job done: a float, a metal arm, and a variable resistor. The float, being naturally buoyant, sits right on the surface of the fuel. It's connected to the movable arm, which pivots up and down as the fuel level changes.
This arm is mechanically linked to the variable resistor, which is really the brains of the operation. A resistor's job is to control how much electricity flows through a circuit. As the float arm moves, it sweeps a contact across the resistor, changing the resistance value.
When the tank is full, the float is high, and the resistor is set to one value (like 33 ohms in the American standard). As you burn fuel, the float drops, moving the arm and changing the resistance until it hits the "empty" value (240 ohms). This changing signal is exactly what tells your gauge where to point its needle.
A float arm sender essentially "feels" the fuel level. The higher the fuel, the less electrical resistance it sends to the gauge, and the higher the needle on your dash points.
More Advanced Sending Unit Technologies
While the float arm system has been a reliable workhorse for decades, marine tech has come a long way. Newer fuel sending units for boats often eliminate the moving parts that can wear out or get stuck, offering much better accuracy, especially when you're bouncing around in rough water.
Two popular modern alternatives are reed switch and ultrasonic senders.
- Reed Switch Senders: Picture a sealed vertical tube with a series of tiny, magnetically activated switches (called reed switches) inside. A float with a magnet slides up and down the outside of this tube. As the float passes each switch, its magnetic field closes it, changing the circuit's total resistance and giving a stepped, but very reliable, reading.
- Ultrasonic Senders: This is a cool, non-contact technology. A sensor mounted at the top of the tank sends an ultrasonic pulse down to the fuel's surface. It then measures the time it takes for that pulse to bounce back. Based on this timing, it calculates the distance to the fuel and figures out the level with incredible precision—all without any parts ever touching the fuel.
This chart breaks down the core mechanism and typical accuracy of these common sender types.
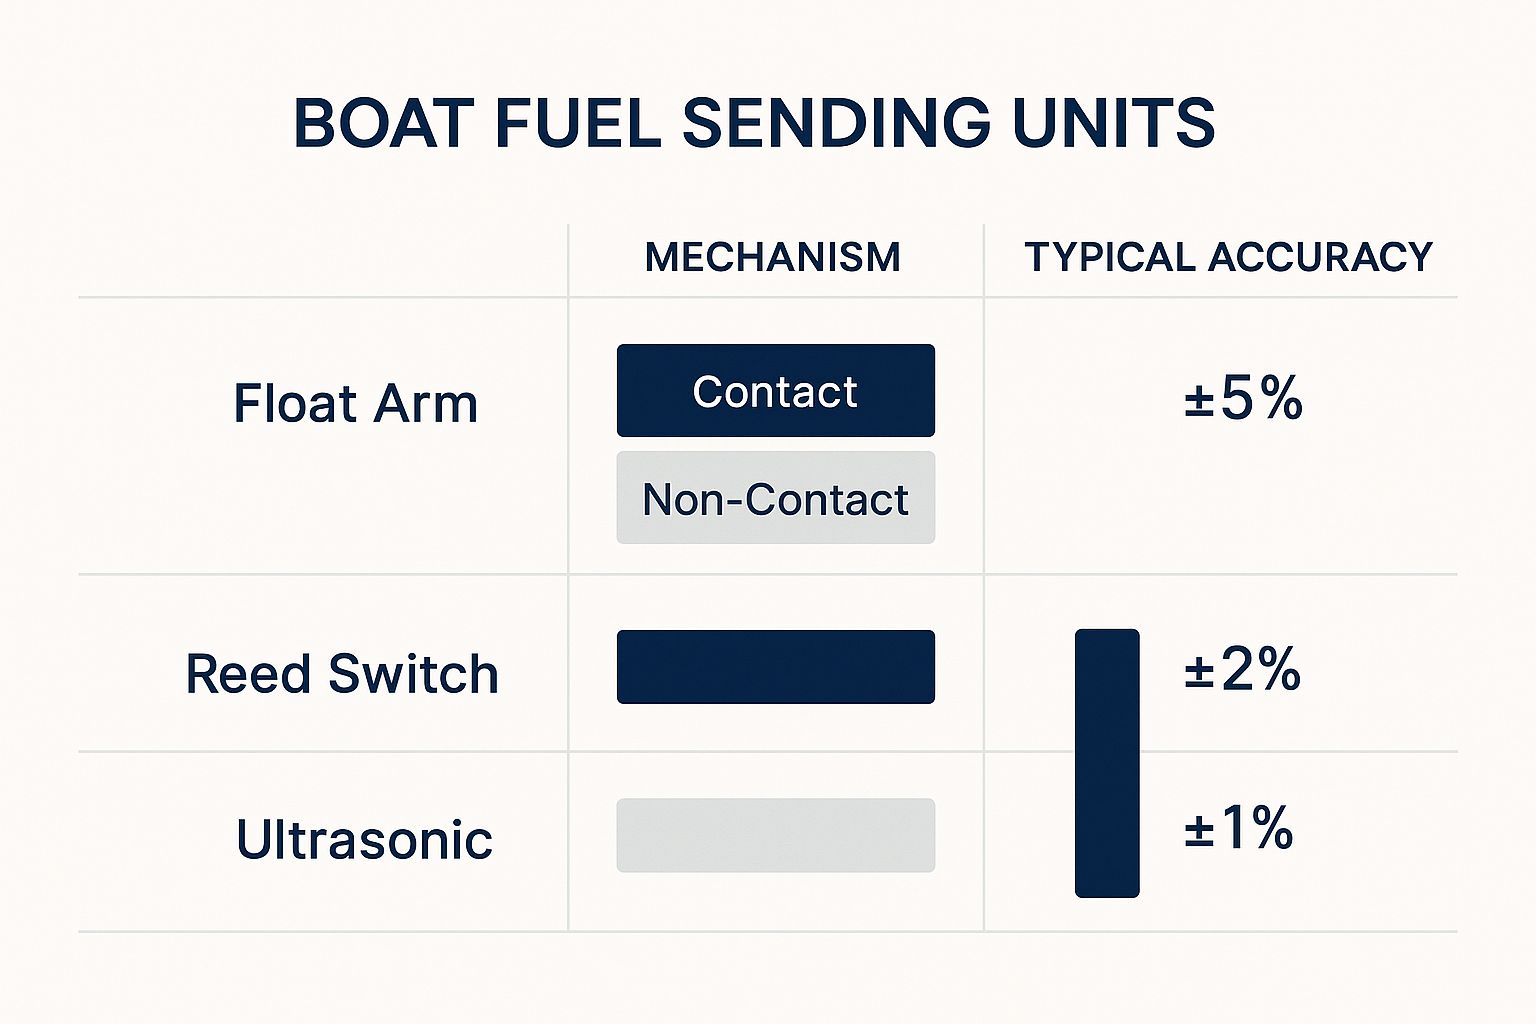
As you can see, there's a clear trade-off. As the technology moves from direct contact (float arm) to non-contact (ultrasonic), the potential for accuracy goes way up. You can dive deeper into what makes a great marine fuel level sensor in our detailed guide on the topic.
Ultimately, each type offers its own set of advantages depending on your boat, your tank's shape, and just how much precision you need for peace of mind out on the water.
How to Choose the Right Fuel Sending Unit
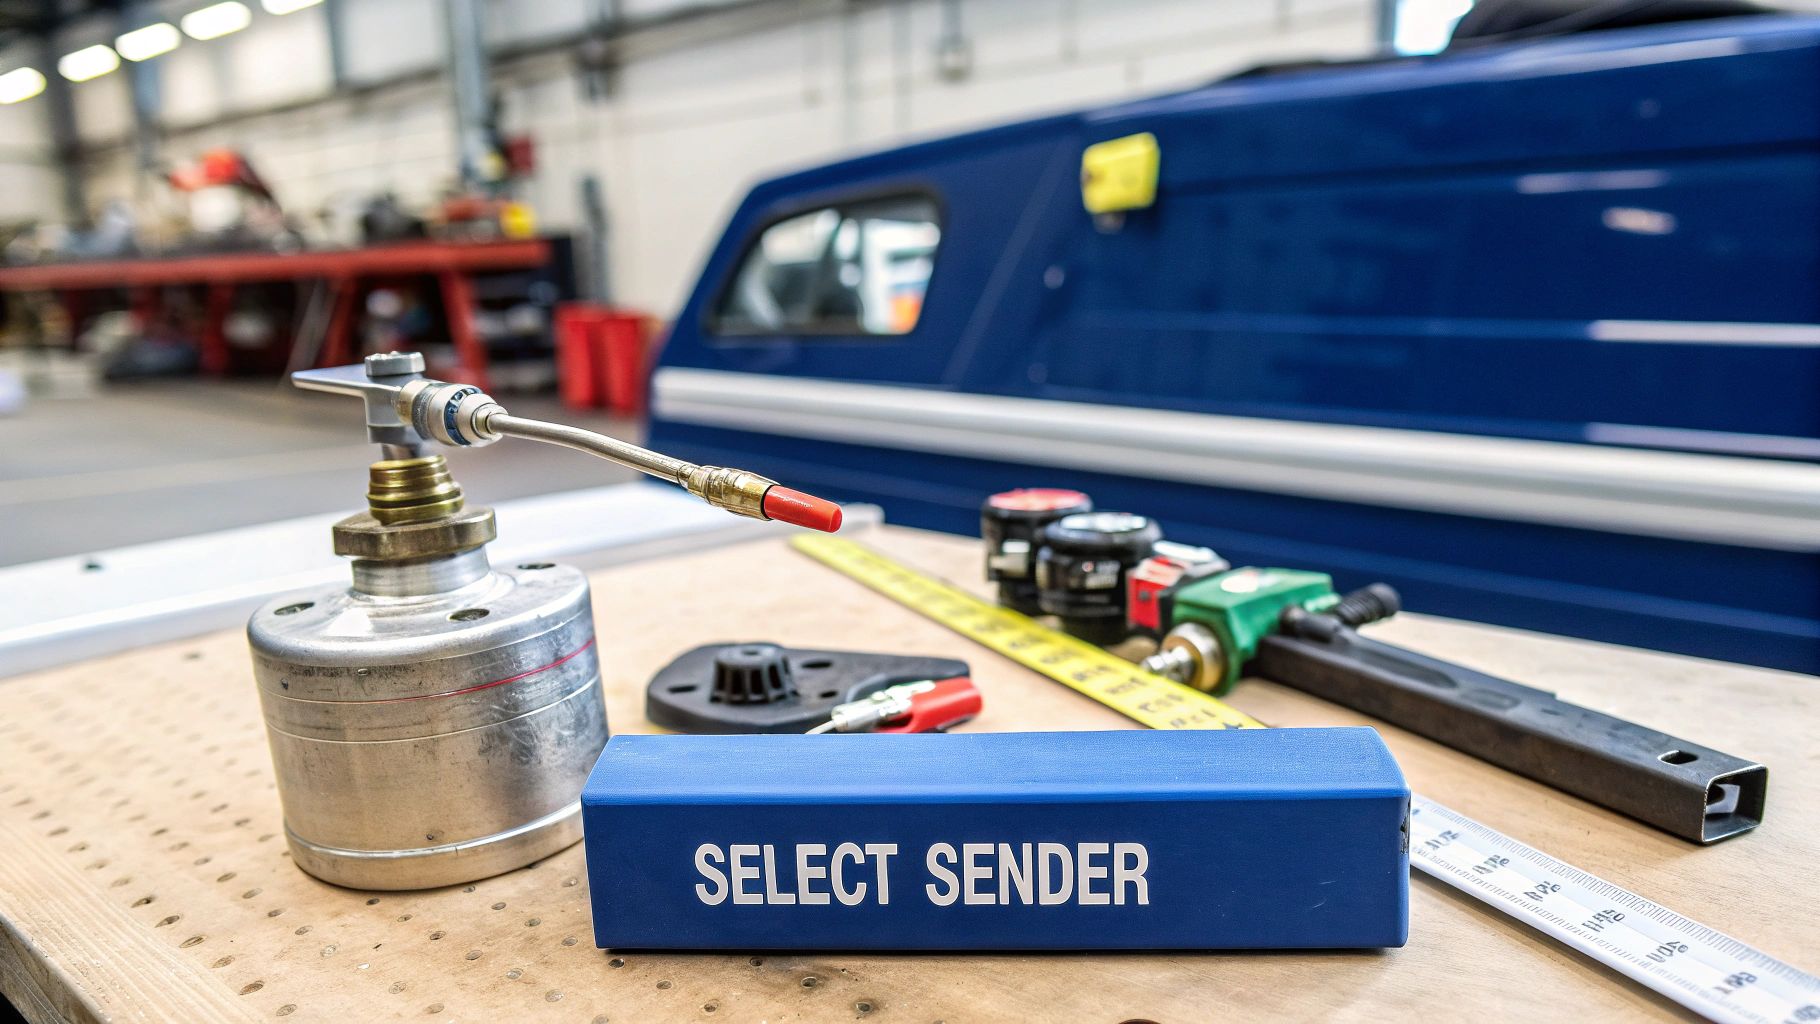
Picking the right fuel sending unit for your boat is more than just grabbing one off the shelf. Think of it as finding a translator—the sender needs to speak the same language as your fuel gauge and be a perfect fit for your tank.
Get it wrong, and you're stuck with a gauge that lies to you. That kind of frustration defeats the whole purpose of having one in the first place. This all comes down to getting three things right: physical fit, mounting style, and electrical compatibility. Let's walk through exactly what you need to check to get this sorted out.
Match the Sender Length to Your Tank Depth
First things first: the sender has to be the right length for your tank. It’s like a dipstick. If it’s too short, your gauge will scream "empty" while you still have plenty of fuel. Too long, and it'll bottom out, never showing a full reading and possibly getting damaged.
To nail this, you need a solid measurement of your tank's internal depth. Always measure from the inside top surface, right where the sender mounts, straight down to the bottom. A good rule of thumb is to pick a sender that’s about a half-inch to an inch shorter than your tank's total depth. This little bit of clearance ensures the float can move freely without ever hitting the bottom.
Verify Your Mounting Pattern and Materials
With the length sorted, it’s time to look at how it actually attaches to the tank. Thankfully, the marine industry has a pretty common standard that makes life easier.
- SAE 5-Hole Pattern: This is the one you’ll see most often. It’s a simple circular bolt pattern with five screw holes. If your old unit has this setup, finding a replacement is usually a breeze.
- Threaded or Other Mounts: Some boats, especially older or custom-built ones, might have a sender that screws directly into the tank or uses a different bolt layout. It's always a smart move to pull the old unit out and take a look before you buy anything.
Don’t forget about the material. Today’s ethanol-blended fuels can be tough on certain plastics and metals. For this reason, stainless steel is almost always your best bet. It stands up to gasoline, diesel, and ethanol without corroding, giving you years of reliable service.
Ensure Electrical Compatibility with Your Gauge
This is the step that trips up so many people. Your sender and gauge have to be electrically matched to work together. This relationship is defined by their ohm range, which is just a measure of electrical resistance.
The most common mistake in replacing a fuel sender is creating an electrical mismatch. A 240-33 ohm sender paired with a 0-180 ohm gauge will never provide an accurate reading. They must share the same resistance standard.
There are two main standards you absolutely need to know:
- American Standard (240-33 Ohm): This is the go-to in the United States. With this setup, the sender reads 240 ohms when the tank is empty and 33 ohms when it's full.
- European Standard (0-180 Ohm): You'll find this on most European-built boats. It works the opposite way, reading 0 ohms at empty and 180 ohms at full.
If you're only replacing the sender, you must buy one that matches the ohm range of your current gauge. If you’re swapping out both, you can pick either standard, just make sure the new sender and gauge are sold as a matched pair.
To help you decide which technology suits your needs, here is a quick comparison of the most common types of fuel sending units for boats.
Comparison of Boat Fuel Sender Types
This table breaks down the key differences between the most popular sender technologies you'll find on the market. Each has its place, depending on your boat, budget, and how you use it.
| Sender Type | Working Principle | Best For | Pros | Cons |
|---|---|---|---|---|
| Float Arm | A float on a swinging arm moves a contact across a variable resistor. | General recreational boating; budget-conscious boaters. | Inexpensive, widely available, and simple to install. | Prone to fuel slosh, moving parts can wear out or stick. |
| Reed Switch | A magnetic float moves along a sealed tube, activating a series of switches. | Boats in rough seas; owners wanting more stability than float arms. | No direct fuel contact with electronics, very durable, less affected by slosh. | More expensive, reading changes in steps rather than smoothly. |
| Ultrasonic | A sensor sends sound waves to the fuel surface and measures the return time. | High-performance boats; boaters needing maximum precision. | Extremely accurate, no moving parts, unaffected by fuel slosh. | Highest cost, may require calibration for odd-shaped tanks. |
Ultimately, the best choice is the one that fits your tank, matches your gauge, and gives you the peace of mind you need when you're out on the water.
Installing Your New Fuel Sending Unit
https://www.youtube.com/embed/VTq6vqQKucQ
Alright, you've got your new fuel sending unit. Now for the fun part: installation. Many boaters who are comfortable with a wrench can handle this job, but let's be crystal clear—you're working with your boat's fuel system. Safety is not just a priority—it's everything.
Take your time here. This isn't a race. The real win is a safe, leak-free installation that gives you accurate fuel readings for seasons to come. Rushing can easily lead to a dangerous fuel leak or a bad connection, putting you right back where you started.
Preparing for a Safe Installation
Before a single tool comes out of the bag, the entire focus needs to be on creating a safe workspace. Fuel vapors are heavier than air and can settle in the bilge or other low spots, creating a recipe for disaster. Getting this prep work right is non-negotiable.
Here’s what you absolutely must do first:
- Disconnect the Power: Before you do anything else, kill all power to the boat by disconnecting the battery. This simple step removes the risk of an accidental spark igniting fumes.
- Get the Air Moving: Open up every hatch, port, and window you can. If you're working in a garage or covered slip, get a fan going to create a steady airflow through the boat.
- No Sparks, Period: This means no smoking, no open flames, and no running other electrical tools nearby that could create a spark. Be strict about this.
- Have a Fire Extinguisher Ready: Keep a proper, marine-rated fire extinguisher right next to you. Make sure you know how to use it.
Safety isn't a suggestion; it’s a requirement. Taking these initial steps seriously can be the difference between a successful DIY project and a catastrophic failure.
Key Steps in the Installation Process
Once the area is properly ventilated and secure, you can get down to the actual swap. The job boils down to carefully removing the old unit, prepping the tank surface, and installing the new sender to create a perfect seal.
-
Remove the Old Unit: Start by carefully loosening the screws that hold the old sender in place. As you lift it out, be gentle and guide the float arm through the opening without bending it. Keep a few rags handy to soak up any drips.
-
Clean the Mounting Surface: Don't skip this step. It's absolutely crucial for preventing leaks. You need to clean the tank surface around the opening completely, scraping off any old gasket residue, sealant, or corrosion. The surface needs to be perfectly clean and smooth for the new gasket to do its job.
-
Install the New Sender and Gasket: Always use the new gasket that came with your sending unit. Position it over the opening, then carefully lower the new sender into the tank. Before you tighten anything, make sure the float arm has room to move freely from top to bottom without bumping into the tank walls or baffles.
-
Secure and Reconnect: Tighten the mounting screws in a star pattern, like you would when changing a tire. This applies even pressure and ensures a leak-proof seal. Reconnect the wires (usually just a ground and a signal wire) to the clean, secure terminals. If you hit a snag with the wiring, our guide on common fuel gauge and sending unit issues has some helpful pointers.
This piece of equipment is part of a much bigger picture. The global marine fuel injection system market, for example, was valued at USD 5.71 billion and is projected to keep growing. This trend highlights the push for more reliable and efficient fuel technologies across the boating world. You can read more about the growth of the marine fuel system market to see where things are headed.
Once everything is buttoned up, reconnect the battery and test your gauge. If it's not reading correctly, double-check your wiring. Most importantly, if you smell gas or spot even the smallest leak, disconnect the battery immediately and don't hesitate to call a professional marine technician.
Troubleshooting Common Fuel Gauge Issues
Even the best marine gear can hit a snag, and honestly, few things on a boat are more frustrating than a fuel gauge you can't trust. When your gauge starts acting up, the problem almost always boils down to one of three things: the gauge at the helm, the wiring connecting it all, or the fuel sending unit itself.
The good news? You don't have to be a master marine electrician to figure it out. With a few straightforward checks, you can usually track down the problem pretty quickly. Let’s walk through the most common headaches and how to pinpoint the cause.
My Gauge Is Stuck on Full
You know you’ve burned half a tank, but the needle is stubbornly pegged at "F". This is the classic symptom of an electrical short. On a typical American (240-33 ohm) system, a full tank creates low resistance. If the signal wire from the sender gets grounded somewhere between the tank and the dash, it creates a short circuit.
This short tricks the gauge into thinking the resistance is as low as it can possibly be, so it shoots up to "Full" and stays there.
Quick Test: Head back to your fuel tank and unplug the signal wire from the sending unit (it's usually pink). If the gauge needle drops to "Empty," you've found your culprit—it's almost certainly a bad sender. If the needle stays on "Full," the problem is a grounded wire somewhere between the tank and your helm.
My Gauge Is Stuck on Empty
On the flip side, a gauge that always reads empty (or never moves off the peg) points to an open circuit. This simply means the electrical signal from your sender isn't making it to the gauge. An empty tank equals high resistance, and a total break in the circuit is the highest resistance you can get.
This can happen for a few reasons:
- A broken wire: The signal wire might be cut or has come loose.
- A bad ground: The gauge or the sender might have lost its ground connection.
- A failed sender: The sending unit itself has simply given up the ghost.
To figure this out, you can do a quick grounding test. With the ignition on, disconnect the signal wire from the sending unit and touch it directly to a good ground (like the sender's ground screw or even the negative battery terminal). If the gauge needle swings all the way to "Full," you know the gauge and the wiring are good. That leaves the fuel sending unit as the problem.
My Gauge Jumps Around Erratically
Is your fuel needle dancing around like it's at a concert? This is almost always caused by a poor or intermittent connection. As the boat bounces on the water, a loose wire makes and breaks contact, firing off chaotic signals that make the gauge go haywire.
Start by checking for loose or corroded connections at these three spots:
- The back of the fuel gauge: Wiggle the signal, ground, and power wires to make sure they're tight.
- The terminals on the sending unit: These live in a harsh environment and are prime candidates for corrosion.
- Any wire splices: Trace the wiring loom from the tank to the helm and inspect any connections along the way.
A flaky ground is an incredibly common cause of wonky readings. Every electrical part on your boat, including the fuel sending units for boats, needs a solid connection to ground. Without that clean path back to the battery, the signals get messy and unreliable. Cleaning a corroded ground connection or running a fresh ground wire can often be the simple, immediate fix.
What's Next in Marine Fuel Monitoring
The world of marine tech never stands still, and fuel monitoring is right there in the mix. For decades, the simple float-arm sender has been the standard, but the future is all about getting more precise, reliable, and connected on the water. This isn't just about knowing how much fuel you have; it's about using that data to make boating safer, more efficient, and a whole lot less stressful.
The biggest leap forward is the move to non-contact sensors. Instead of a mechanical arm sloshing around inside your tank, new systems use ultrasonic or advanced magnetic fields to get a reading. This is huge because it eliminates the physical moving parts that are prone to wearing out, getting gummed up, or just plain failing over time. By keeping the sensitive electronics completely separate from the fuel, their lifespan and reliability go way up.
The Rise of Integrated Systems
This jump in sensor tech is part of a much bigger picture: the fully connected boat. Modern fuel sending units for boats don't just send a signal to a single gauge on the dash anymore. They're designed to communicate with all your other electronics through networks like NMEA 2000, and that integration is a total game-changer.
Now, your fuel data can pop up right where you need it most:
- On your Chartplotter: You can literally see your fuel range drawn out on your navigation map.
- On your Multifunction Display (MFD): Watch your real-time fuel burn right next to your engine RPM and speed to find that sweet spot for efficiency.
- In Fleet Management Software: For anyone running a commercial operation, this means tracking fuel use across an entire fleet to slash costs and streamline maintenance.
The whole point is to turn a simple gauge reading into real, actionable intelligence. It helps you plan trips with more confidence, spot potential engine issues early, and just manage your vessel better all around.
As boat technology gets smarter, the focus is on improving the entire experience, from fuel efficiency to passenger comfort. It's all connected—even understanding things like what makes for the best boat for avoiding seasickness is part of this holistic view.
A Global Push for Better Data
This demand for smarter sensors isn't just a local trend; it's happening worldwide. The Asia-Pacific region, for example, is the fastest-growing market for marine sensors, thanks to huge investments in shipbuilding and autonomous vessel research. As maritime systems get smarter, the need for hyper-accurate fuel sending units for boats explodes.
Want to see which systems are really making waves? Take a look at our guide to the top fuel tank monitoring systems for 2025.
Got Questions? We’ve Got Answers.
Even after you've got the basics down, a few common questions always seem to surface about fuel sending units. Let's tackle some of the most frequent ones to clear up any lingering confusion and help you get things right.
Do I Need an American or European Sending Unit?
This is a big one, and getting it wrong means your gauge simply won't work. It all comes down to making sure your sender and your gauge are speaking the same electrical "language."
- American Standard (240-33 ohm): Think of this as the US standard. The sender shows high electrical resistance (240 ohms) when the tank is empty and low resistance (33 ohms) when it's full.
- European Standard (0-180 ohm): Common on boats built in Europe, this standard is the opposite. It shows low resistance (0 ohms) at empty and high resistance (180 ohms) at full.
The bottom line? If you're only swapping out the sender, you must get one that matches the ohm range of your current gauge. If you mix and match, your gauge will either read backward or not at all.
Can I Cut a Fuel Sender to Fit My Tank?
Maybe, but you have to be very careful. It really depends on the type of sender you're working with. While it can be a handy trick, a wrong move will destroy the unit instantly.
A word of caution: Altering a fuel sending unit will almost certainly void the warranty. Always read the manufacturer’s instructions before you even think about cutting or bending anything.
With a classic float-arm sender, you can usually get away with carefully cutting the metal rod or bending the arm to adjust its swing to your tank's depth. But—and this is a big but—you should never try to cut a modern tube-style sender (like a reed switch or capacitive model). Their delicate internal electronics are sealed and precisely calibrated. Cutting the tube will kill it on the spot.
Why Does My Fuel Gauge Go Crazy in Rough Water?
Ah, the bouncing fuel gauge needle. If you've seen this, you're dealing with "fuel slosh." It's a classic issue, especially with older float-arm senders. When the water gets choppy, the fuel in your tank sloshes around, making the float bob up and down wildly and sending a jumpy, unreliable signal to your gauge.
For a true reading, always check your gauge when the boat is still and the water is calm. If that bouncing needle drives you nuts or you need reliable readings while underway, it might be time for an upgrade. A modern reed switch or ultrasonic sender is designed to be much more stable and isn't nearly as affected by fuel slosh, giving you a steady, trustworthy reading even when the waves kick up.
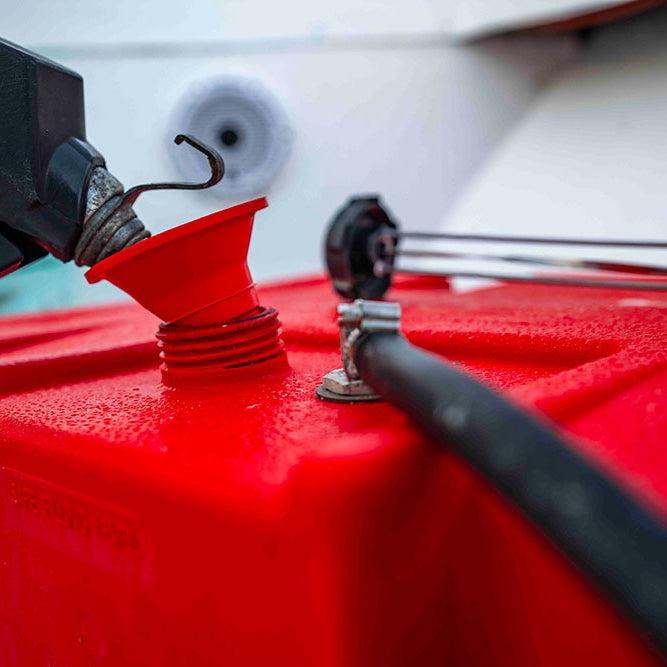
Ready to eliminate fuel spills and the guesswork of filling up for good? Discover how CLiX Fueling Solutions offers a simple, automatic shut-off system that ensures a perfect, spill-free fill every time. Learn more and protect your boat and the environment at clixfueling.com.