Recognizing Gelcoat Damage: What Your Boat Is Telling You
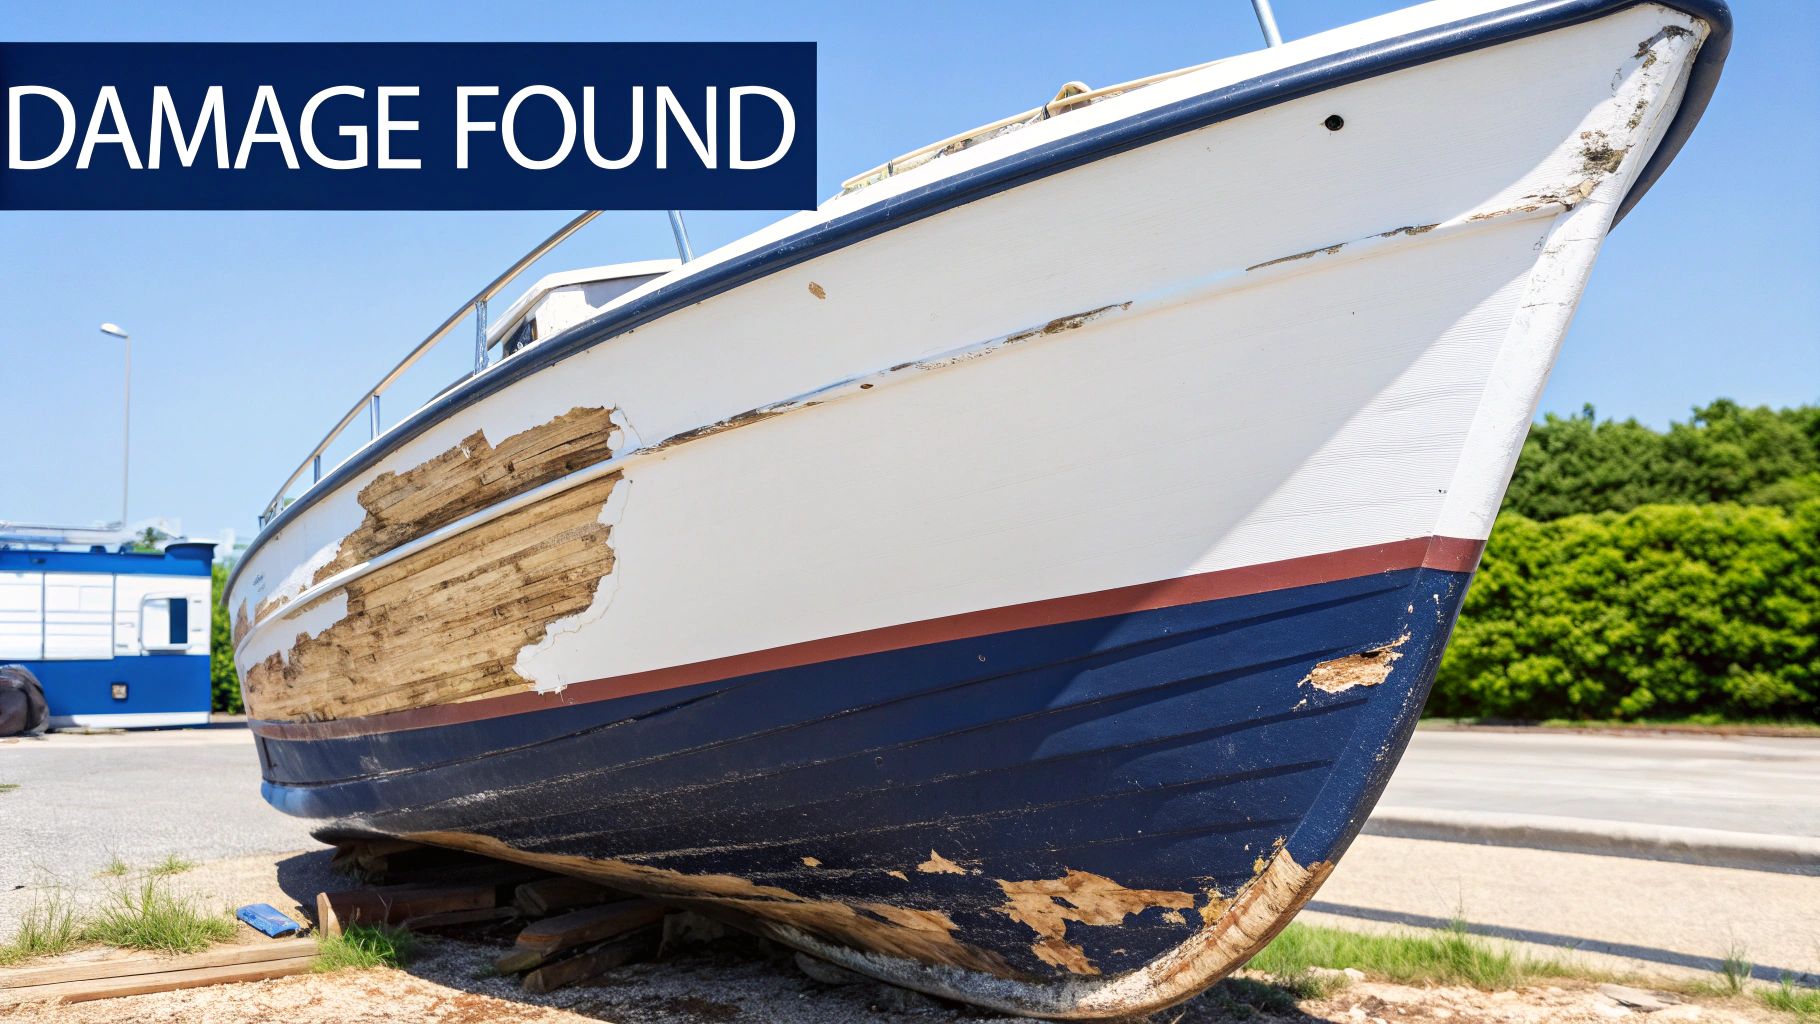
Your boat's gelcoat is its primary shield against the harsh marine environment. Knowing how to spot damage is the first step towards effective boat gelcoat repair. This involves distinguishing between minor surface imperfections and more serious underlying issues. Ignoring seemingly small problems now can lead to significant expenses later.
Common Types of Gelcoat Damage
-
Stress Cracks: These appear as thin, spiderweb-like cracks, often forming around fittings or in high-stress areas. While they may appear superficial, stress cracks can point to structural problems beneath the surface. Accurate diagnosis is essential.
-
Chips and Gouges: Docks, debris, and even anchors can cause chips and gouges, exposing the underlying fiberglass. These aren't merely cosmetic concerns. They allow water to seep in, potentially causing further damage.
-
Scratches: Light scratches affect the gelcoat's shine but might not need immediate attention. However, deep scratches can compromise the gelcoat’s protective layer. A careful evaluation is necessary.
-
Oxidation and Fading: UV exposure causes the gelcoat to oxidize, leading to a chalky surface and faded color. This frequent problem requires regular maintenance and is a common reason for boat gelcoat repair.
-
Blistering: Trapped water under the gelcoat can form blisters. Left untreated, these blisters can lead to delamination and structural issues. Prompt action is crucial.
The Impact of Marine Environments
Different marine environments pose unique threats to gelcoat. Saltwater speeds up corrosion, demanding more frequent cleaning and upkeep. Freshwater, while less corrosive, can still harbor algae and organisms that harm the gelcoat. Boats moored in saltwater often show more oxidation and blistering than those in freshwater. This requires different boat gelcoat repair strategies depending on the environment.
Early Detection Saves Money
Fixing minor gelcoat damage early prevents costly repairs down the line. A small, unattended chip allows water to penetrate the fiberglass, leading to more extensive damage. Regular maintenance like waxing and polishing extends the gelcoat’s life. The global marine gel coat market is growing rapidly, highlighting the importance of this material. The market was valued at approximately $4.2 billion in 2022 and is expected to reach $7.5 billion by 2032. This growth is fueled by increased demand for boat gelcoat repair and shipbuilding. You can learn more here. Regular inspection and timely boat gelcoat repair are essential for protecting your investment and keeping your vessel in excellent condition.
Building Your Boat Gelcoat Repair Arsenal
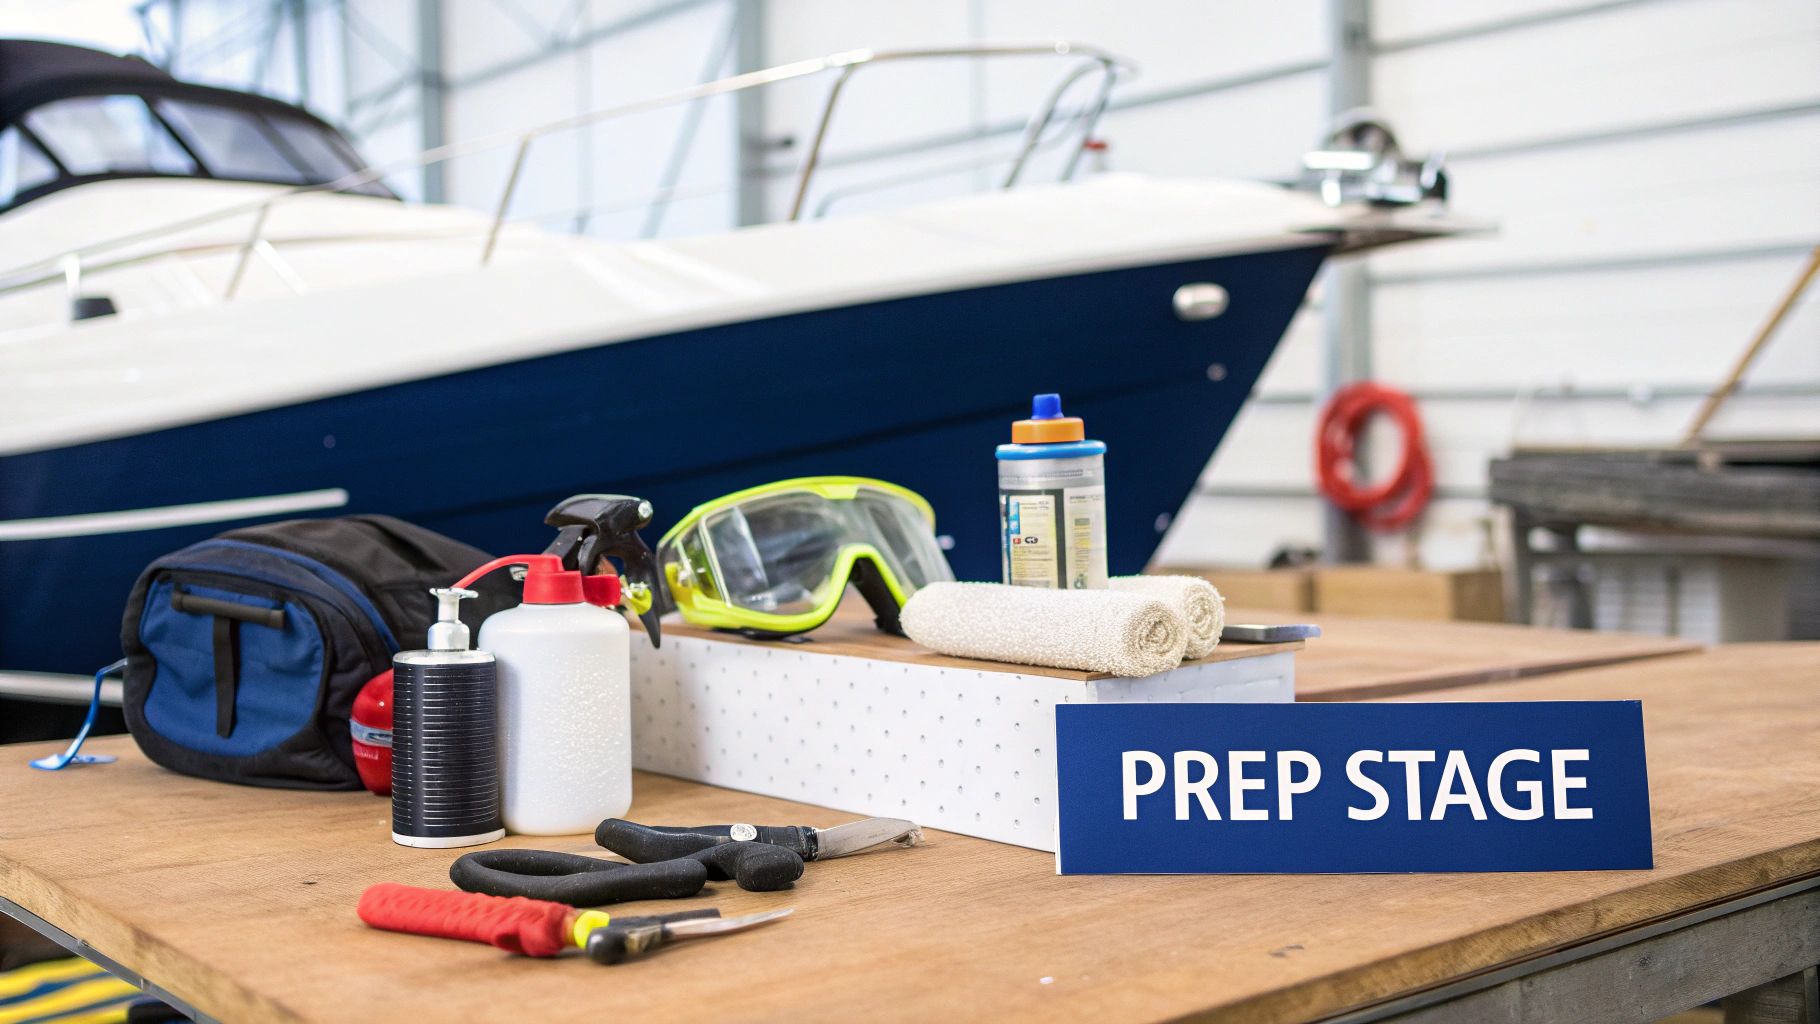
Effective boat gelcoat repair begins with the right tools. Much like a surgeon needs precise instruments, a successful gelcoat fix relies on a well-stocked arsenal. This means having the necessary supplies and knowing which specialized tools can take your repairs from adequate to amazing.
Essential Tools and Materials
Some tools are absolutely essential for any boat gelcoat repair project. These foundational items form the core of your repair kit:
- Gelcoat Repair Kit: These kits frequently include pre-matched gelcoat paste, hardener, and mixing sticks.
- Acetone: This is used for cleaning and degreasing the repair area before you apply the gelcoat.
- Mixing Cups and Sticks: Accurate measurements are crucial for proper gelcoat curing.
- Sandpaper (Various Grits): From coarse grit to fine grit sandpaper, this is essential for shaping and smoothing the repair.
- Polishing Compound: Use a polishing compound for restoring shine after the repair cures.
- Masking Tape: Masking tape protects surrounding areas throughout the repair process.
- Safety Glasses and Gloves: Protecting yourself is paramount during any repair project.
Specialty Tools For A Professional Finish
Beyond the basics, certain tools can significantly improve the quality of your boat gelcoat repair.
- Dual-Action Polisher: A dual-action polisher creates a smoother, more professional finish compared to hand polishing.
- Preval Sprayer: A Preval Sprayer is ideal for applying a thin, even coat of gelcoat, particularly for larger repairs.
- Radius Gauge: A radius gauge helps you match the curve of your boat's hull when shaping the repair.
Unexpected Household Items That Can Help
Sometimes, the most useful tools aren't from a marine supply store. Several common household items can enhance your boat gelcoat repairs.
- Plastic Wrap: This creates a smooth, non-stick barrier for curing gelcoat, preventing a tacky finish.
- Razor Blades: Use these for carefully trimming excess gelcoat and achieving clean lines.
- Cotton Swabs: These are perfect for precise application of acetone or other cleaning solutions.
Before we discuss color matching, let's look at the tools and costs associated with gelcoat repair. The following table outlines the essential supplies you'll need for various levels of repair.
Essential Boat Gelcoat Repair Supplies
| Item | Purpose | Repair Level | Approximate Cost |
|---|---|---|---|
| Gelcoat Repair Kit | Contains gelcoat, hardener, and mixing sticks | All Levels | $30 - $60 |
| Acetone | Cleaning and degreasing | All Levels | $5 - $10 |
| Mixing Cups and Sticks | Accurate mixing | All Levels | $5 - $10 |
| Sandpaper (Various Grits) | Shaping and smoothing | All Levels | $10 - $20 |
| Polishing Compound | Restoring shine | All Levels | $15 - $25 |
| Masking Tape | Protecting surrounding areas | All Levels | $5 - $10 |
| Safety Glasses and Gloves | Personal protection | All Levels | $10 - $20 |
| Dual-Action Polisher | Professional finish | Advanced | $100 - $200 |
| Preval Sprayer | Even gelcoat application | Intermediate/Advanced | $15 - $25 |
| Radius Gauge | Matching hull curves | Advanced | $15 - $30 |
This table provides a general overview; prices may vary depending on brand and retailer. Remember that investing in quality tools can lead to better, longer-lasting repairs.
Color Matching: A Critical Step
Achieving a seamless boat gelcoat repair involves careful color matching. This can be especially tricky with older boats. Thankfully, there are several techniques to help.
- Gelcoat Color Charts: Many manufacturers offer detailed color charts to assist in identifying your gelcoat’s shade.
- Custom Color Matching: Some suppliers provide custom color matching services for a truly invisible repair.
- Tinting: If you can't find a perfect match, tinting the gelcoat can help blend the repair, minimizing its visibility. This is generally better than a mismatched patch.
For example, if your boat has slightly faded red gelcoat, a new, bright red might clash. Tinting the new gelcoat to match the faded color will result in a far less noticeable repair. Also, keep in mind how sunlight affects color perception. Check your color match in different lighting conditions to ensure a consistent blend. This detail is what separates a DIY fix from a professional-looking job.
Sustainable Practices For Boat Gelcoat Repair
Boat gelcoat repair doesn't have to harm the environment. Sustainable options exist for both protective gear and repair materials. Reusable respirators and gloves reduce waste. Some manufacturers also offer eco-friendly gelcoat products that minimize environmental impact without compromising performance. This means you can achieve a professional, durable repair while being environmentally conscious. You might be interested in: How to master more sustainable boating practices. By selecting your tools and materials thoughtfully, you can create a boat gelcoat repair arsenal that’s both effective and environmentally sound. This protects your investment and preserves the waters you love.
The Definitive Boat Gelcoat Repair Process
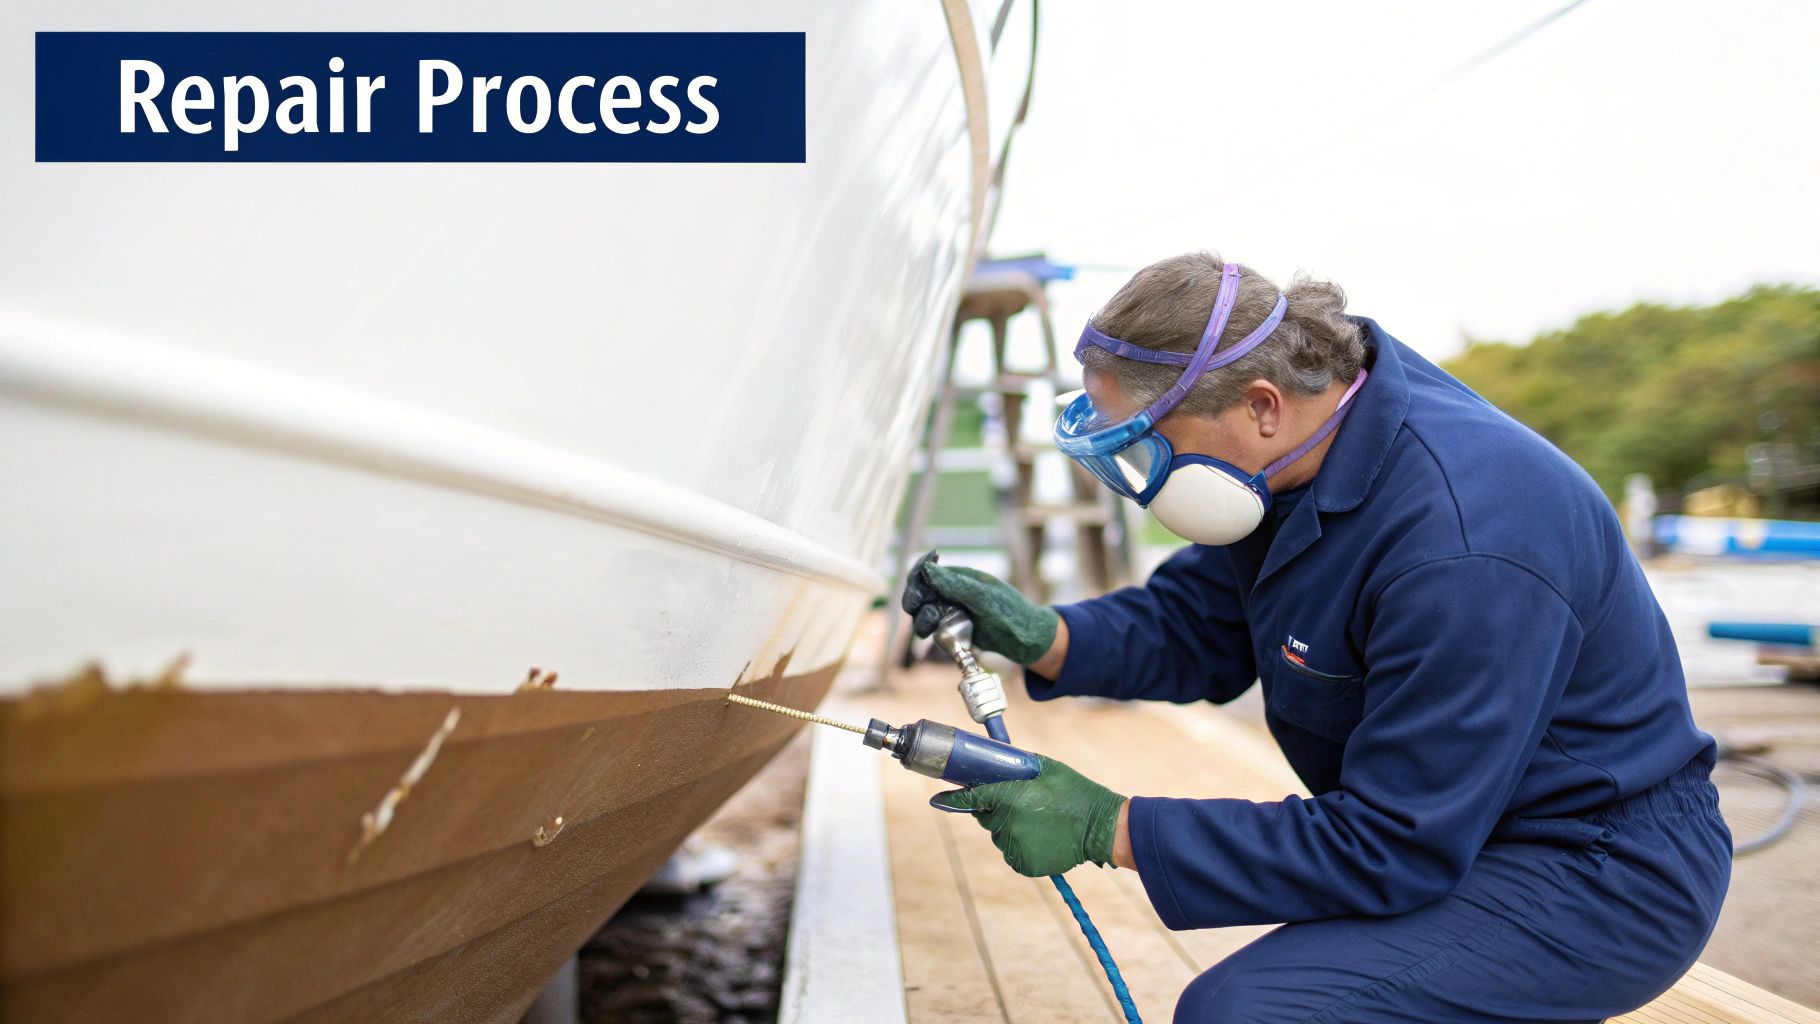
Now that you have your tools and know where the damage is, let's get into the boat gelcoat repair process. This guide will help you confidently tackle these repairs and bring your boat's finish back to life.
Preparing the Damaged Area
A good boat gelcoat repair starts with prepping the surface. This ensures the new gelcoat sticks properly and creates a strong bond. First, clean the area well with acetone to remove any wax, grease, or dirt.
Then, sand the damaged area with sandpaper, starting with a rough grit (around 80 grit) and working your way up to finer grits (like 320 grit or higher). This creates a smooth, feathered edge for a seamless blend. Finally, use masking tape to protect the surrounding area.
Applying the Gelcoat
With the surface ready, it's time to apply the gelcoat. For small repairs, use a gelcoat paste. Mix the gelcoat and hardener following the manufacturer's directions. Apply the mixture, slightly overfilling the damaged area.
For larger repairs, a Preval sprayer or similar tool helps create an even coat. Practice on a scrap piece first. This is especially helpful for repairs at the waterline or on vertical surfaces. Cover the repair with plastic wrap for a smooth, airtight cure.
Finishing the Repair
After the gelcoat cures (check the manufacturer's instructions), remove the plastic wrap. Use a razor blade to trim any excess gelcoat, making the surface flush.
Next, use fine-grit sandpaper to smooth the area, blending it seamlessly with the surrounding gelcoat. Finally, polish the area to restore the shine. A dual-action polisher will help achieve a professional finish. For a scratch on a curved hull section, use a radius gauge to match the hull’s contour.
Also, remember that temperature and humidity affect curing times. Gelcoat cures faster in warmer temperatures, while high humidity can slow things down.
Troubleshooting Common Challenges
Boat gelcoat repair can have its challenges. High humidity can slow curing. Adding a little acetone to the gelcoat mix can help it cure in humid conditions. Temperature changes can also affect curing, and you might need to adjust the hardener ratio.
Working around hardware can be tricky. Mask these areas carefully, or remove the hardware temporarily if needed. This extra step ensures a lasting repair around fittings and cleats. Be careful when removing hardware, especially structural pieces. For impact damage at the waterline, use a reinforcing filler before applying the gelcoat.
Industry Trends and Gelcoat's Significance
The global gelcoat market highlights the importance of boat gelcoat repair. In 2023, this market was valued at about $1.35 billion and is expected to grow at a CAGR of over 13.3% from 2024 to 2032. You can find more information here.
The marine industry plays a big part in this growth, as gelcoats are widely used for both looks and protection in harsh marine environments. This growth reflects the rising popularity of recreational boating and the ongoing need for yacht repairs and renovations.
Specialized Approaches for Different Hull Materials
Different hull materials may require adjustments to the gelcoat repair process. For example, aluminum hulls often need an epoxy primer before applying gelcoat. Wooden hulls might need special sealers or fillers. Understanding these differences will save you time and ensure a successful, lasting repair.
Pro-Level Boat Gelcoat Techniques You Can Master
Mastering boat gelcoat repair goes beyond simple patching. This section explores advanced techniques that elevate repairs to a professional standard, improving your boat's appearance, longevity, and value.
Seamless Blending and Invisible Transitions
Invisible repairs are the mark of a truly professional gelcoat job. This requires careful attention to detail and specialized methods. Blending repairs on curved surfaces, like the waterline, presents a different challenge than patching a flat area.
Vertical surface repairs also pose difficulties. Gravity can cause the gelcoat to sag before curing. Professionals often use techniques like applying multiple thin coats or thickening the gelcoat to maintain the desired shape. Achieving an invisible transition involves carefully feathering the edges and precise color matching.
Working with Weathered Gelcoat
Older boats with weathered gelcoat require extra care. The original gelcoat may be oxidized or faded, complicating color matching. The gelcoat itself can also be brittle, requiring a more delicate touch during sanding and preparation.
Professionals frequently use techniques like tinting new gelcoat to match faded colors. They also might use flexible fillers to work with the movement of an older hull. This attentive approach ensures both a durable and aesthetically pleasing repair.
Addressing Transom Damage and Hardware Installations
The transom, the back of the boat, is a high-stress area prone to damage which can compromise structural integrity. Gelcoat repair here often involves reinforcing the damaged area with fiberglass matting before applying the gelcoat, creating a robust repair built to last.
Repairs around hardware installations require similar precision. Professionals carefully mask off the hardware to prevent gelcoat from sticking. Sometimes they even remove the hardware entirely for more complex repairs. This prevents future corrosion or malfunction.
North America currently holds a significant 31.52% share of the global gelcoat market (2023). The U.S., driven by recreational and commercial marine activity, is projected to see a CAGR of 13.9% from 2024 to 2030. Learn more about gelcoat market trends. This growing demand underscores the importance of skillful gelcoat repair.
Adapting Professional Spray Techniques for DIY
While professional boatyards often use spray equipment, DIY enthusiasts can adapt these techniques for smaller projects. Tools like the Preval sprayer can apply thin, even coats, similar to professional results. This is especially helpful for larger repairs or those in hard-to-reach locations.
Achieving a factory-quality finish with hand tools is possible. Meticulous sanding and polishing are essential. Using a dual-action polisher and high-quality polishing compounds can significantly improve the final look. These techniques empower boat owners to achieve professional-looking results without expensive spray equipment.
DIY or Pro: Making the Right Gelcoat Repair Decision
Deciding between a DIY gelcoat repair and hiring a professional for your boat can be tricky. Several factors play a role in this decision, such as the severity of the damage, your DIY skills, how much time you have, and your budget. Making a well-informed choice ensures a good repair that protects your boat.
Let's break down the key considerations to help you make the best decision for your situation.
Evaluating the Damage: Superficial vs. Structural
Minor scratches and superficial chips are often good candidates for DIY gelcoat repair. These smaller projects can be satisfying to complete and can save you money. However, more significant damage like large cracks, deep gouges, or damage affecting structural components requires professional expertise. Attempting complex repairs without training could worsen the damage and lead to higher repair costs later.
Cost-Benefit Analysis: Time vs. Money
DIY gelcoat repair takes time. You'll need to research the repair process, buy the right gelcoat repair materials, and dedicate time to the preparation, application, and finishing. Professional repairs cost more upfront but save you significant time and effort. If you're short on time or lack the necessary skills, a professional repair might be more cost-effective in the long run.
Skill Level: Novice vs. Expert
Boat gelcoat repair requires specific techniques and tools to achieve a durable and attractive finish. Color matching, surface preparation, and gelcoat application all demand skill that improves with practice. If you're a novice, trying complex repairs might not give you the desired result. Professionals have the experience and tools to achieve seamless repairs that blend in perfectly. For complex or highly visible damage, a professional is often the best choice. You might find some helpful information on fiberglass boat repair.
Finding and Evaluating Marine Repair Specialists
If you decide to hire a professional, finding a qualified marine repair specialist is essential. Ask other boat owners or your local marina for recommendations. Check online reviews and testimonials, too. When you’re comparing specialists, ask about their experience with gelcoat repairs, their repair process, and cost estimates. Ask to see photos of their previous work to get an idea of their skill and attention to detail. A trustworthy specialist communicates clearly and ensures you understand the repair process.
To help you visualize the key differences, here's a comparison table:
DIY vs. Professional Gelcoat Repair Comparison
| Factor | DIY Repair | Professional Repair | Considerations |
|---|---|---|---|
| Cost | Lower upfront cost | Higher upfront cost | Long-term costs if DIY repairs fail |
| Time Investment | Significant time commitment required | Less time commitment | Value of your personal time |
| Equipment Needs | Requires purchase or rental of tools and materials | Professional-grade equipment used | Storage and maintenance of equipment for DIY |
| Typical Results | Satisfactory for minor repairs; potential for imperfections with complex damage | Consistent, high-quality results; seamless repairs | Risk of further damage if DIY repair is unsuccessful |
| Skill Level | Requires some DIY skills; learning curve for optimal results | Specialized skills and experience | Potential for costly mistakes if DIY skill level is insufficient |
This table highlights the trade-offs between handling the repair yourself and entrusting it to a professional. Think about your own situation to make the right choice.
DIY Success Stories and Cautionary Tales
The boating community is a valuable resource. Online forums and boating groups are great places to learn from others’ experiences with DIY gelcoat repairs. Hearing about both successes and failures can help you decide whether to try a DIY repair or hire a pro. For instance, learning about someone’s color-matching issues might convince you to seek professional help for a similar project. On the other hand, seeing a successful DIY repair of minor spider cracks might give you the confidence to try the same repair on your boat. The boat and yacht repair industry relies on gelcoat repairs and has seen growth due to more people owning boats worldwide. This growth comes from rising disposable incomes and increased interest in recreational boating. You can learn more about industry trends.
Making the Decision With Confidence
The decision to DIY or hire a pro boils down to honestly assessing your skills, the time you have available, and the complexity of the repair. By carefully considering these factors, you can confidently choose the best approach for your needs and keep your boat in top condition.
Protecting Your Investment: Gelcoat Maintenance Mastery
The most effective boat gelcoat repair is preventative maintenance. Any seasoned boater will tell you that preserving your boat's gelcoat and avoiding costly repairs down the line comes down to understanding how storage, cleaning, and protective products all play a role.
The Impact of Storage on Gelcoat
Your boat's storage environment has a big impact on its gelcoat's lifespan. Outdoor storage exposes the gelcoat to harmful UV rays, fluctuating temperatures, and environmental pollutants, all of which contribute to faster deterioration. While indoor storage is ideal, it’s not always an option. Even simple steps like using a high-quality boat cover can make a huge difference in reducing sun damage and weathering. It's similar to parking your car in a garage versus leaving it in the sun; the protected car’s finish will last much longer.
Seasonal Maintenance: A Proactive Approach
A seasonal maintenance routine is key to minimizing gelcoat issues. Before winterizing your boat, a thorough cleaning and waxing creates a protective shield against harsh weather. When spring arrives, another cleaning and inspection should be done, allowing you to address any minor issues before they become major problems. This proactive approach can drastically reduce the need for more extensive gelcoat repairs later.
Also, remember the differences between saltwater and freshwater environments. Saltwater is highly corrosive, meaning more frequent cleaning and waxing is necessary. Freshwater, while less corrosive, can encourage algae growth that can stain and damage the gelcoat. Adjusting your maintenance routine to suit your boating environment is crucial for optimal protection. You might be interested in: How to master seasonal boat maintenance.
Protective Products: Separating Fact from Fiction
Many protective products on the market promise amazing results, but not all deliver. Talk to experienced boaters or marine maintenance professionals for advice on which products offer genuine long-term protection. A high-quality marine wax, for example, provides a strong barrier against UV rays and contaminants, unlike some "miracle" sprays that offer little more than a fleeting shine. Understanding these differences can save you money and frustration.
Creating a Personalized Maintenance Schedule
A maintenance schedule designed around your boating habits will ensure your vessel stays in excellent condition. Frequent boaters need more frequent cleanings and inspections. If you use your boat less often, a more relaxed schedule is usually fine. Consider your boat's age, too. Older gelcoat typically needs extra care. The key is to customize the schedule to your specific needs and usage patterns, rather than relying on a generic plan.
Saltwater vs. Freshwater Maintenance
Saltwater environments need particular attention due to the corrosive nature of salt. Rinsing your boat with fresh water after every saltwater trip is vital. This simple practice removes salt residue before it has a chance to damage the gelcoat. For boats kept in saltwater, more frequent waxing, perhaps every three months, offers additional protection against corrosion. Freshwater environments, while less harsh, still require regular cleaning to prevent algae and other biological growth.
By combining consistent maintenance with smart protective strategies, you can significantly extend the life of your boat's gelcoat. This proactive approach saves you money on repairs and keeps your boat looking its best, year after year.
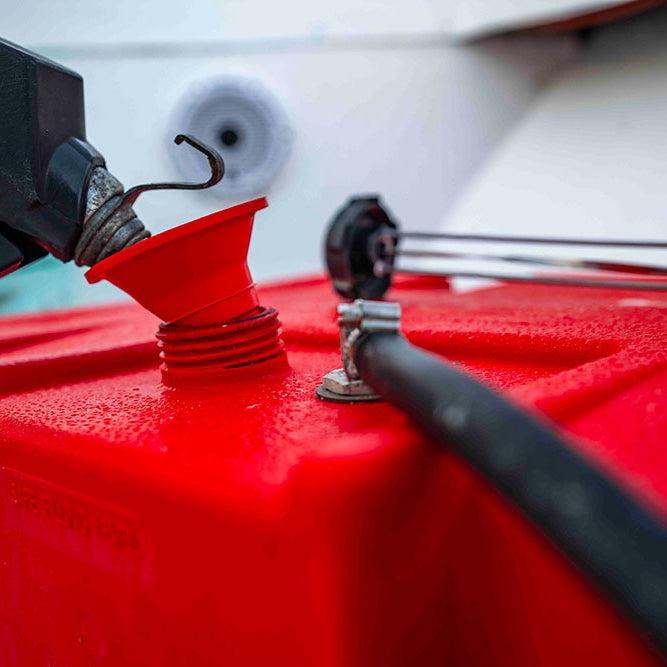
Looking for a hassle-free fueling solution that also protects your boat's finish? Check out CLiX Fueling Solutions, the innovative spill-free system that prevents overfilling and potential fuel damage to your gelcoat.